使用HTTPS——SSL申请
本文选用:
Let’s Encrypt作为证书颁发机构
开头杂谈
HTTPS作为目前网站的常用要求,除了在访问网站上,能让浏览器出现个小🔒,还能在某些科学事业上用户真TLS伪装。
1. HTTP服务验证获得证书
1.1 域名
对于配置HTTPS我们首先需要一个域名
当然了为了省去备案什么的麻烦,建议在国外的域名网站上购买(毕竟有看到网友说套路云好像解析不了vultr)这里我在namesilo上购买了一个域名,然后点击这里
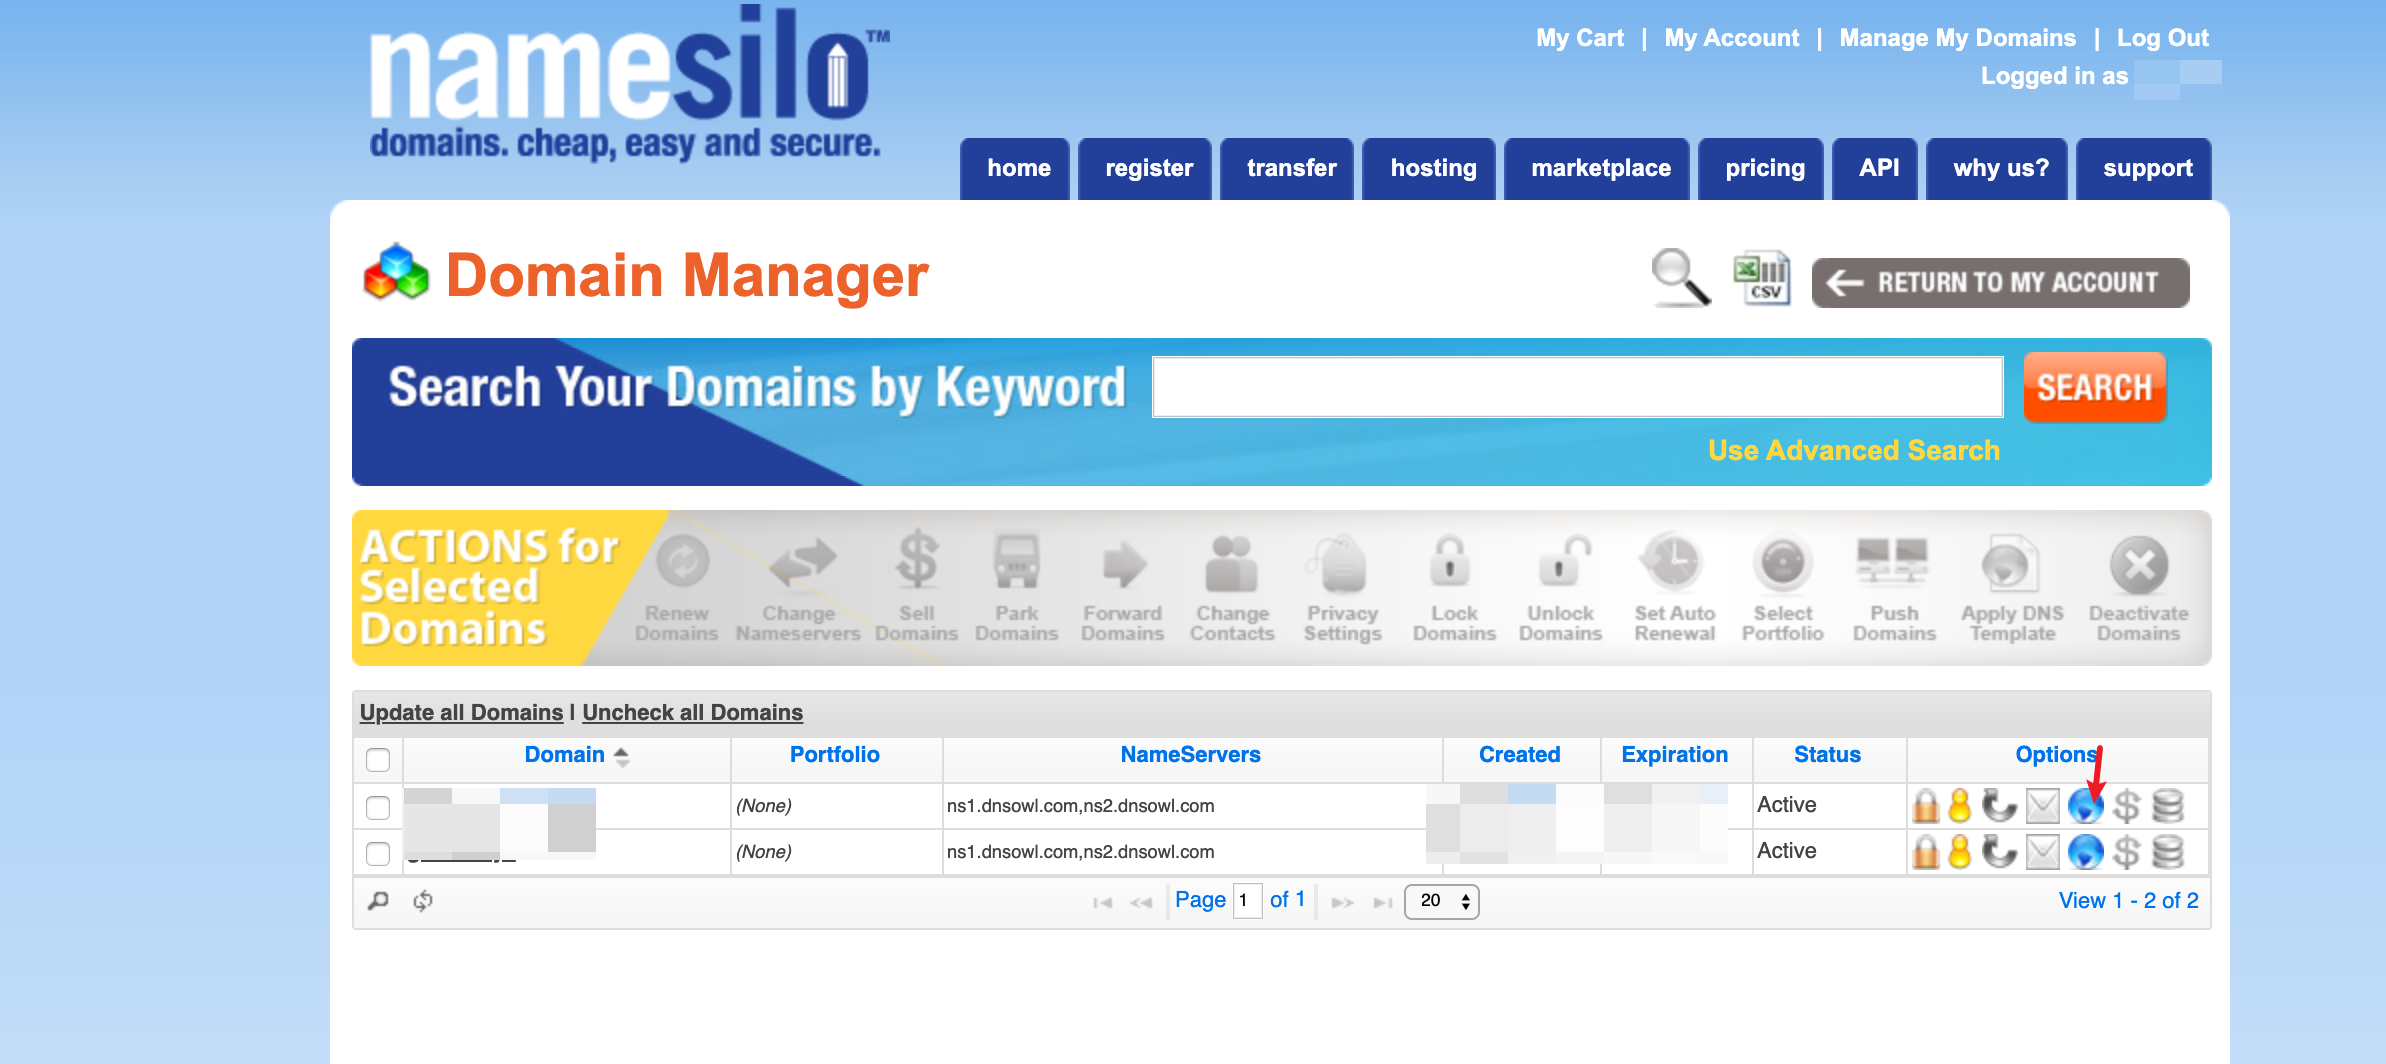
把原先给你自动生成的都删除,然后点击上方的A
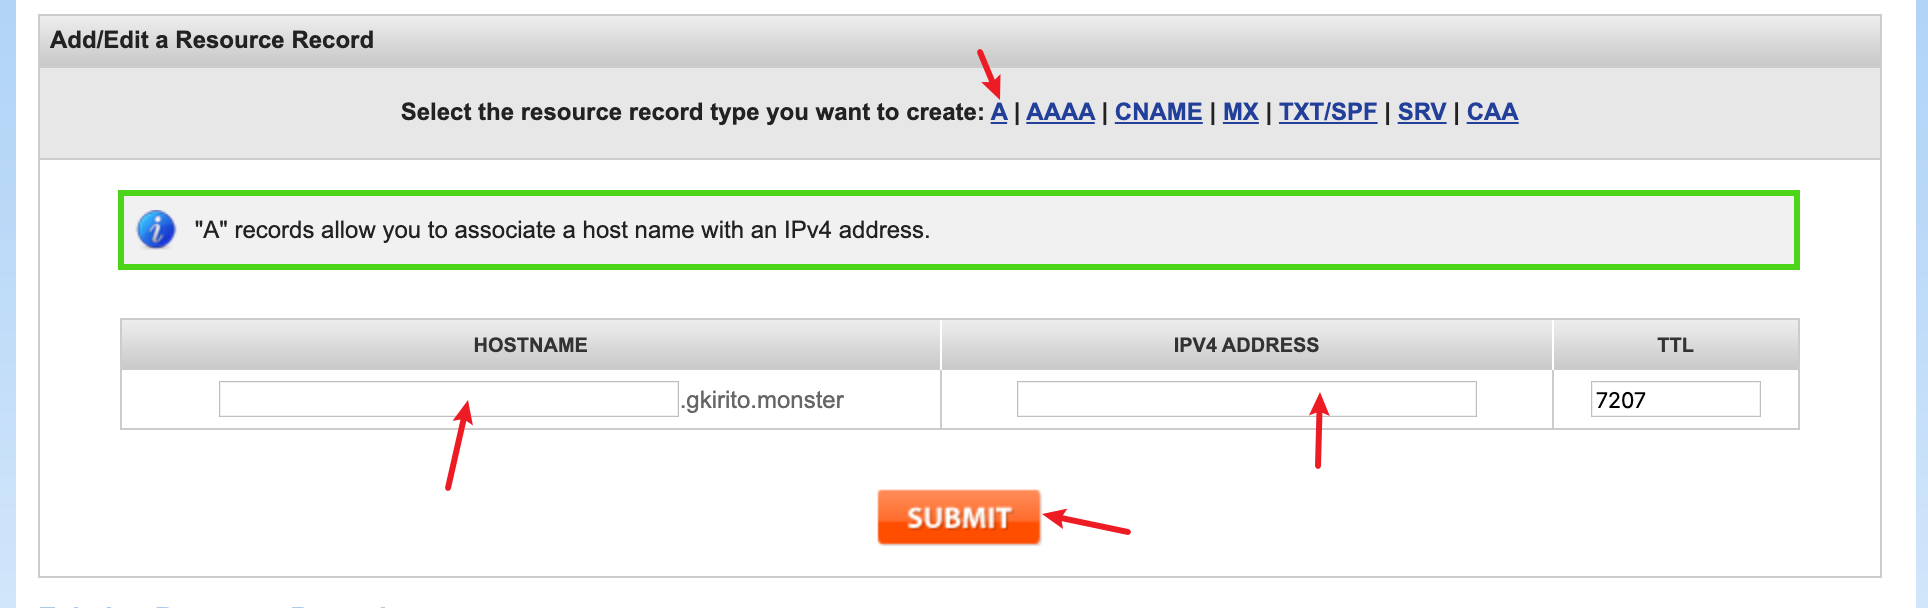
添加一个域名解析,然后就是等待了,他们的dns刷新提交大概每15分钟一次,所以这一步拿到前面做。15分钟后建议去ping查询网站用域名ping一下效果
当然也可以买了域名交给cloudflare.com来解析,cf的DNS解析速度比较快。
1.2 Certbot安装
由于使用Let’s Encrypt作为证书颁发机构,所以根据官网文档,我们直接采用certbot作为申请工具
针对不同系统的安装方式,可在certbot官网查看,一下以CentOS 7为例
1.2.1 首先安装snapd
|
|
在yum安装过程中出现了error:
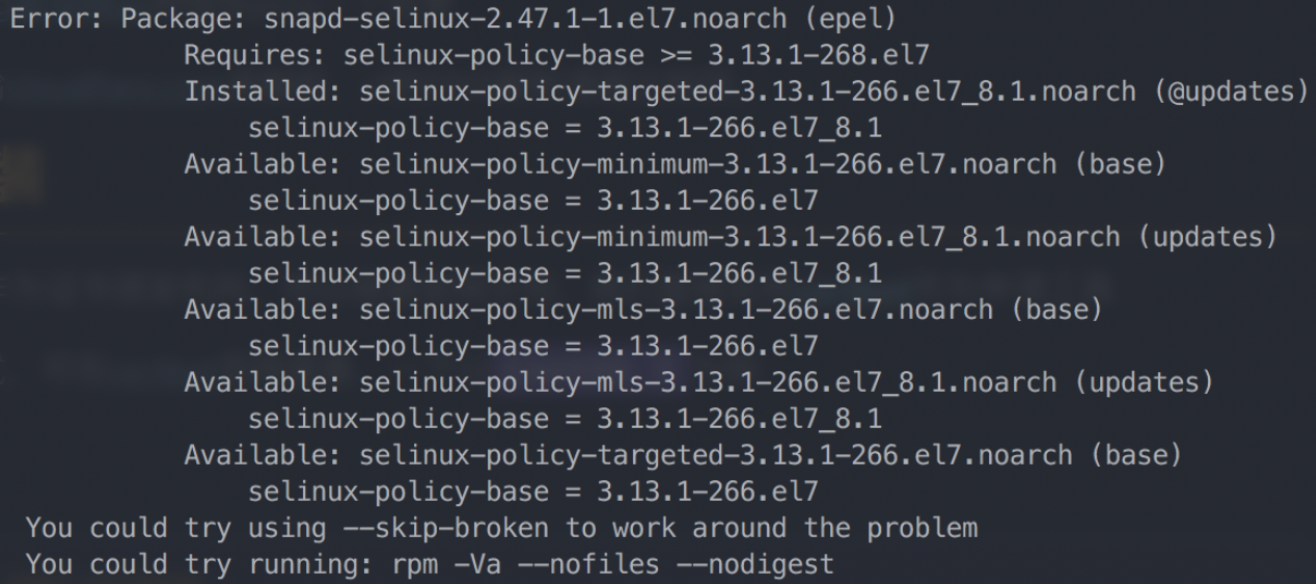
搜了一下,需要开启``CR(Continuous Release)`repository,命令如下:
|
|
之后继续 sudo yum install snapd即可
1.2.2 确保安装了最新的snapd
|
|
1.2.3 删除服务器上多余的Certbot
|
|
1.2.4 安装Certbot
|
|
1.3 安装Nginx
|
|
这个时候去访问一下网页,如果发现不能访问,检查一下80端口是否已经在了。
检查的工具可能需要装一下
|
|
然后检查一下80端口
|
|

确定80端口已经由Nginx开放,但是仍旧无法访问,应该是iptables或者firewall防火墙的问题了
解决方案:
-
关闭iptables和firewall,一劳永逸
1 2 3 4# iptables systemctl stop iptables.service # firewall systemctl stop firewalld.service -
为80端口添加通行
1 2 3 4 5 6 7 8 9 10 11 12# iptables iptables -A INPUT -p tcp --dport 80 -j ACCEPT iptables -A INPUT -p tcp --dport 443 -j ACCEPT service iptables save systemctl restart iptables.service # firewall firewall-cmd --zone=public --add-port=80/tcp --permanent firewall-cmd --zone=public --add-port=443/tcp --permanent # --zone #作用域 # --add-port=80/tcp #添加端口,格式为:端口/通讯协议 # --permanent #永久生效,没有此参数重启后失效 systemctl restart firewalld.service
当然了为了方便后面配置ws+tls,这里先把443端口也开放
这时候再访问自己的ip,就能看到Nginx的欢迎页面,或者是CentOS的介绍页面
1.4 配置Nginx和ssl
先去Nginx的conf.d目录下建一个conf文件,然后参照一下我一下这个文件
|
|
XXX.com改为你刚刚绑定好的域名
server{
    listen 80;
    server_name XXX.com;
    location / {
        root   /usr/share/nginx/html;
        index  index.html;
    }
}
然后检查一下Nginx的配置,并重载配置
|
|

再去浏览器用域名访问一下,如能正确访问,准备开始ssl申请
|
|
完成后再次访问网页,注意用https访问,可以正常访问
2. 域名DNS验证方式获取证书
以下Shell为Ubuntu使用
此教程对接cloudflare的API
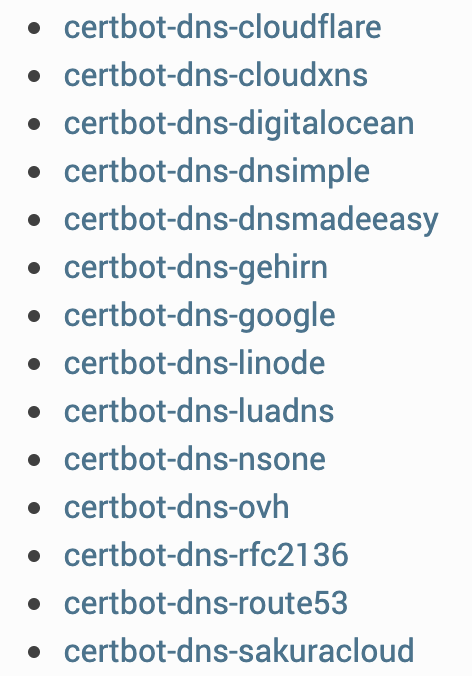
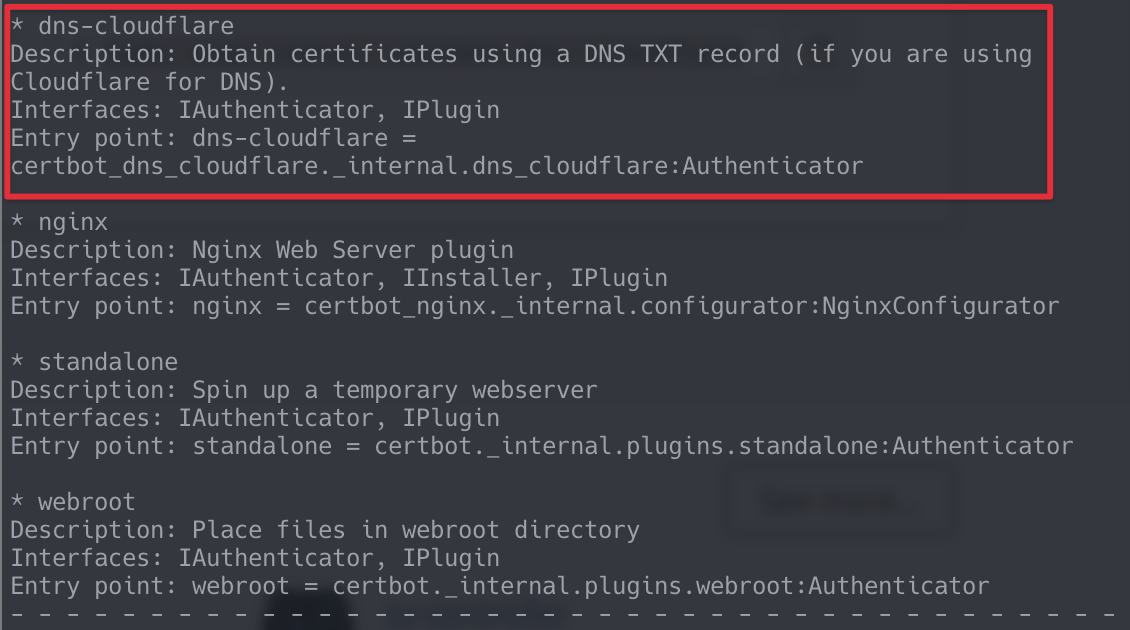
certbot支持的plugins有这些
2.1 域名和Certbot安装
与方法1一样,先准备域名和Certbot安装,域名这里交给了cloudflare
2.1.1 安装snapd
|
|
2.1.2 卸载多余Certbot并安装Certbot
|
|
如果遇到这个问题
 输入以下解决:
|
|
2.2 certbot-dns-cloudflare插件安装
|
|
然后运行
|
|
检查certbot-dns-cloudflare插件是否安装成功
2.3 创建Cloudflare的API的key
登录Cloudflare,点击右上角 头像->我的个人资料->API令牌->创建令牌->编辑区域 DNS->使用模板
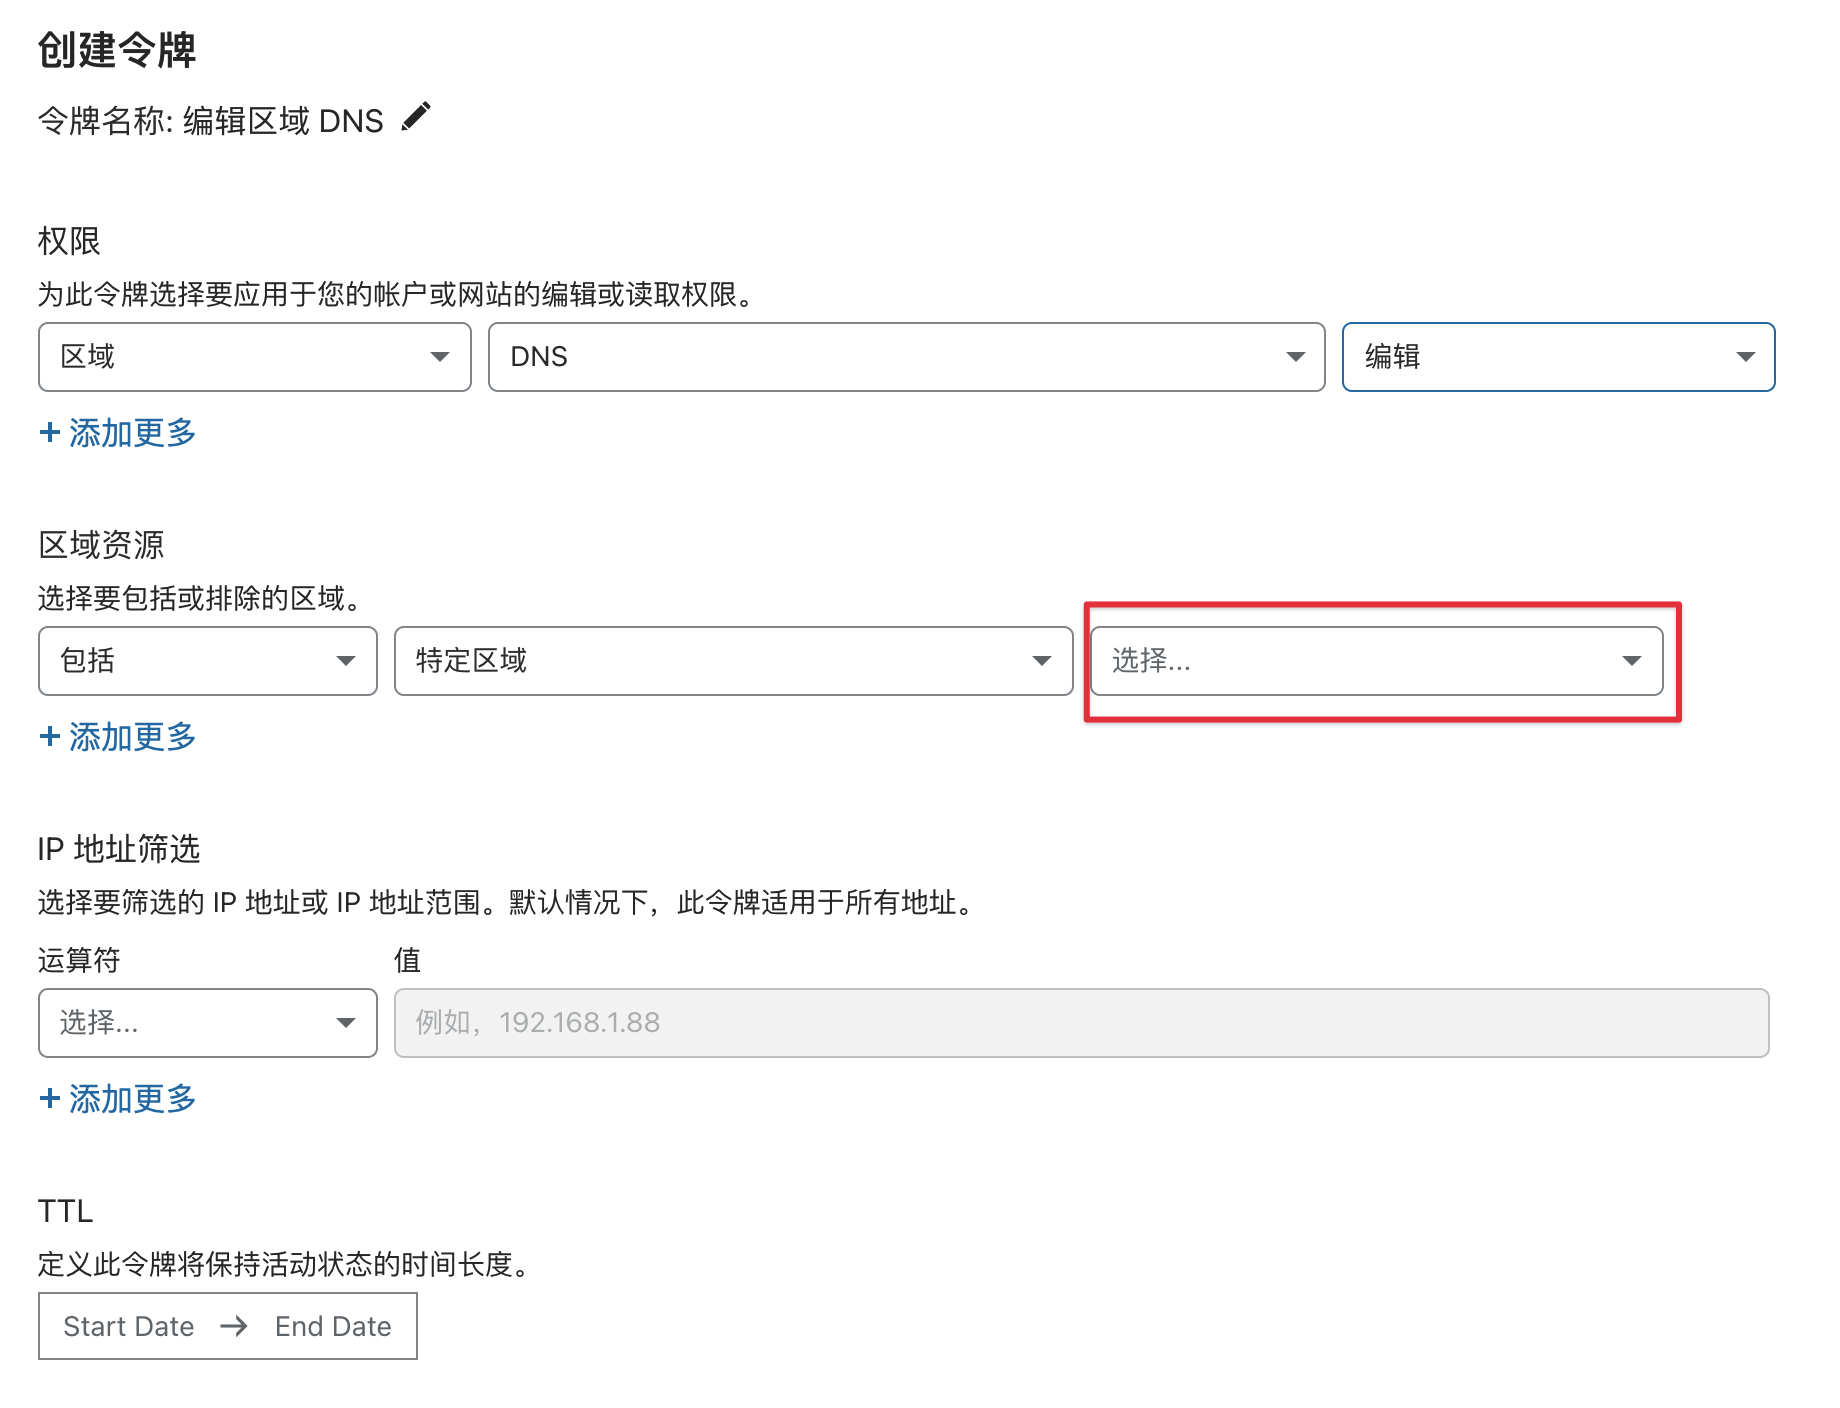 在上图位置选择好对应域名,然后
继续以显示摘要->创建令牌
在上图位置选择好对应域名,然后
继续以显示摘要->创建令牌
2.4 创建存储API调用凭证目录
mkdir -p ~/.secrets/certbot
chmod 0700 ~/.secrets
vim ~/.secrets/certbot/cloudflare.ini在cloudflare.ini文件内填入2.3 创建Cloudflare的API的key中创建的key
|
|
注意⚠️如果cloudflare python module版本过低,只能使用Global API Key,所以2.3 创建Cloudflare的API的key创建的key需为Global API Key,然后按以下格式填入
|
|
最后文件赋予权限
|
|
2.5 申请ssl证书
|
|
XXX.com为你的域名
*.XXX.com为申请根域
注意
- Let’s Encrypt的免费证书只有
90天的有效期。 - certbot具有到期自动续的功能,但是也要留意邮箱的里的到期通知,注意证书防止过期
补充
关于certbot的命令这里补充一些:
|
|
撤销证书后面的--reason有这些选项(可不带):
unspecified(默认), keycompromise, affiliationchanged, superseded, 和 cessationofoperation
一旦证书被revoke后,可以使用delete命令删除证书
|
|
注意:如果你revoke一个证书,那么如果不delete的话,当renew的时候该证书仍然会被更新。